Showing posts with label dessert. Show all posts

Tuesday, January 10, 2012

Caramel Corn: Recipe

Good morning, Kitchies!!  It's been an insanely busy morning, but I need to take a breather, so I thought I'd throw down a post.  I'm pretty sore from derby practice last night and it's making the day that much harder to get through. 

But good, sweet, not-good-for-you food always makes things better, right?  You know I am!  I was going to save this recipe for next week, but most of the comments said they were interested so I bumped up that post to today.  You're welcome.

I was craving caramel corn around New Years and I finally remembered to sit down and find a recipe this last weekend.  I started out looking for a salted caramel sauce recipe (because that's my new cooking obsession) and I stumbled across this awesome caramel corn recipe on my new favorite recipe blog: Recipe Girl.  I had flagged another recipe, but this one just called to me.

Caramel Corn
1/2 cup (1 stick) salted butter
1 cup light brown sugar
1/4 cup light corn syrup
2 teaspoons kosher salt
1/4 teaspoon baking soda
1/2 teaspoon vanilla extract
12 cups popped popcorn

Preheat oven to 300 degrees F. Line a rimmed baking sheet with foil and spray with nonstick spray.

Melt butter in a 1 gallon pot over medium-high heat. Add brown sugar and corn syrup. Stir to combine. Bring to a boil, then reduce the heat to low and let simmer undisturbed for 4 minutes. Stir,then continue to cook for an additional 4 to 6 minutes, stirring every 30 seconds, until the mixture is a deep golden color. Turn off the heat and whisk in salt, baking soda and vanilla. Set the whisk aside and stir in the popcorn. Scoop up the syrup from the bottom and over the top. Keep stirring and scooping the syrup over the popcorn until it is evenly covered and there is no syrup left on the bottom of the pan.

Spread the mixture onto the prepared cookie sheet and bake for 15 to 20 minutes, stirring every 5 minutes, until the caramel corn has turned a deep amber color. Remove the caramel corn from the oven and spoon it onto a waxed paper-lined surface to cool. When completely cooled, store caramel corn in a covered container- it should stay fresh for up to a week.

NOTES:  *You can use air-popped popcorn for this recipe or stovetop too. Here's an easy stove-top method to follow. Microwave popcorn will work as well, but it's not recommended as being the best choice.

My boys *devoured* the remaining stove-top popped popcorn...luckily they were already in bed by the time the caramel corn came out of the oven.  It killed me to work in the kitchen while this was baking.  It smelled soooooo good!

Now, my caramel corn didn't come out near as coated as Recipe Girl's did, but I'm okay with that because I think *that* much coating would be overkill.  And remember I said I was looking for a salted caramel sauce recipe?  This recipe kinda kills that craving because it's a bit salty, but not too much so.  It's just salty enough to enhance the sweet.  Soooo good! 

I have half a gallon baggie full of this and now all I want to do is run home, park my butt on the couch and throw on some trash TV and eat the rest!!!  Somebody asked about calorie content on this, and while I don't know what the count would be, I don't imagine this would be considered a "diet" food.  LOL  Not when your ingredients are sugar, corn syrup and starch. 

Either way, you need to make some of this.  NEED!

Monday, April 11, 2011

Mondays Calls for Cookies

Good morning, Kitchies!!  I had a very productive weekend.  I made a reuseable shopping bag for myself and got started on a bag for Mason's impending daycare days (posts to follow eventually).  I put the decals on the sideboard (post to follow once it's completely finished).  And the hubs and I completely cleared out the garage, laid carpet and moved everything *back* in the garage.  *whew*  We were pretty tired by the end of the evening yesterday because we both stayed up til after 1 on Saturday night.  And then (NO and then)...I woke up the morning, rolled over to see the clock and it said 6:10!  OMG!  The hubs gets up at 5 and I get up at 5:30 - we had to RUSH to get everybody up and out the door by 7...but we did it!  Now I'm at work, all revved up, and it's kinda slow.  So...my lack of patients this morning is your gain.

And what better way to start a crazy Monday morning than with a yummy cookie recipe?  I can't think of anything.  Let's jump right in...

Chewy Peanut Butter Chocolate Chip Cookies
1/2 cup butter, softened
1/2 peanut butter
1 cup packed brown sugar
1/2 cup white sugar
2 eggs
2 Tbsp light corn syrup
2 Tbsp water
2 tsp vanilla extract
2 1/2 cups all-purpose flour
1 tsp baking soda
1/2 tsp salt
2 cups semi-sweet chocolate chips

Preheat oven to 375 degrees F (190 degrees C). 

In a large bowl, cream together the butter, peanut butter, brown sugar, and white sugar until smooth. Beat in the eggs one at a time, then stir in the corn syrup, water, and vanilla. Combine the flour, baking soda, and salt; stir into the peanut butter mixture. Fold in chocolate chunks. Drop by 1/4 cupfuls 3 inches apart onto ungreased baking sheets.
 

Bake for 12 to 14 minutes in the preheated oven, or until edges are golden. Allow cookies to cool for 1 minute on the cookie sheet before removing to wire racks to cool completely. 

NOTES:  My cookies were NOT chewy but I think I know why.  I don't remember adding in the corn syrup.  D'oh!  They were good...just not chewy.  The recipe says ungreased cookie sheet, but I never bake without either parchment paper or my Silpat silicone baking sheet.

Sorry I don't have more pictures than this.  Nate helped me make these cookies and he had a good time helping.  He got to pour all the ingredients in to the bowl and he felt especially important when I had him scrape down the sides of the bowls.  And even though the cookies weren't chewy, they all managed to be eaten!


Any big plans for the week?  We're supposed to get the hardware for the sideboard tomorrow, so the goal is to have it completely finished by the end of the week.  I can't wait because it's already looking awesome and it'll be nice to be able to finally use it!  Other than that, I think the hubs has to go out of town for work.  Oh...and I have to register the boys for daycare.  And I'm going to shop for fabric today at lunch - JoAnn's has a pretty good sale going on!


Until tomorrow...

Wednesday, April 6, 2011

Boom Berry

Good evening, Kitschies!  Have you missed me?  It's been INSANE at work the last two days and I haven't had any time to blog.  I barely have time to glance at everybody else's posts (sorry 'bout that - I'll get caught up eventually).  And by the time I got home last night...I was DONE.  I was in bed before 9 last night...and fast asleep by 10 (after reading for a bit).  Tonight I have a little more energy, but it probably won't last long.  So, while Mason's yelling for Daddy from the confines of his crib and Nate and the hubs are playing Lego Star Wars, I'm going to put this post together (read: before I fall asleep). 

The hubs brought home strawberries the other weekend and he told me it was my responsibility to do something with them.  I wanted Strawberry Shortcake, but I didn't want to use the pre-made cups from the grocery store, so I grabbed my Bisquick box and mixed away.

Classic Strawberry Shortcakes
1 quart (4 cups) strawberries, sliced
1/4 cup sugar
2 1/3 cups Bisquick mix
1/2 cup milk
3 Tbsp sugar
3 Tbsp butter, melted
1/2 cup whipping cream

Heat oven to 425*. In large bowl, mix strawberries and 1/4 cup sugar. Set aside.

In medium bowl, stir Bisquick mix, milk, 3 tablespoons sugar and the butter until soft dough forms. On ungreased cookie sheet, drop dough by 6 spoonfuls.

Bake 10 to 12 minutes or until golden brown. Meanwhile, in small bowl, beat whipping cream with electric mixer on high speed until soft peaks form.

Split warm shortcakes; fill and top with strawberries and whipped cream.

NOTES: Instead of making my own whipped cream, we just used Cool Whip. Besides, if I were to make my own, I would add some powdered sugar and vanilla. Anyway...I baked these on my silicone baking sheet and they came out perfect.

To me, they resembled baked cauliflower, but they didn't taste like cauliflower.  I made these again this last weekend but substituted brown sugar for white sugar - they weren't as good (sorry, Wendi).

So good.  So very, very good!  Both Nate and Mason devoured their helpings and the hubs and I went back and shared another one later that evening.  This is super easy and super yummy - definitely something I'll be making again and again!

It looks like things are a little more calm at the clinic tomorrow...at least that's what I'm hoping.  In other news, I'll be registering my baby for KINDERGARTEN in a month.  *sigh*  He's still so little...I can't believe he's already going to be in kindergarten.  Kinda makes me sad.  But I know he'll have a blast.  I can still be sad, though, right?

Wednesday, March 23, 2011

Bring Me Berries!

First...a moment of silence for the beautiful Elizabeth Taylor.  The world has lost one of the old-time screen beauties and we will be a little less glamorous because of the loss.

Good morning, Kitschies!  After a stoopid windy day on Monday and a really chilly day yesterday, it's gorgeous here in the Land of Entrapment Enchantment with a projected high of 65.  My allergies have eased up just a bit and I'm looking forward to running an errand at lunch so I can soak up some sun.  I love the warm weather and the budding trees of Spring.  But I do not love the wind and the pollen and the resulting allergies.

Last weekend it was pretty windy too.  I wanted to do something but it wasn't worth it to go outside.  Nate and I made cookies on Sunday (recipe will follow in another post soon) and on Saturday night, I made this great, simple recipe.  I found this on Epicurious - that was the first recipe database I tried waaay back in the day (I still use that recipe from time to time).  I need to remember to check that site more often because it really does have great recipes.

Mixed Berry Crisp
 2 12-ounce packages frozen mixed berries (such as blueberries, blackberries, strawberries and raspberries; about 6 cups), unthawed
1/4 cup sugar
1 cup all purpose flour
1 tablespoon fresh lemon juice
3/4 cup old-fashioned oats
2/3 cup (packed) golden brown sugar
1 teaspoon ground cinnamon
1/2 teaspoon ground ginger
1/4 teaspoon ground nutmeg
1/4 teaspoon salt
7 tablespoons chilled unsalted butter, diced

Preheat oven to 375°F. Combine berries, 1/4 cup sugar, 1/4 cup flour and lemon juice in large bowl; toss to blend well. Transfer berry mixture to 9-inch-diameter glass pie dish. Combine remaining 3/4 cup flour, oats, brown sugar, spices and salt in medium bowl. Add butter; rub in with fingertips until topping holds together in small moist clumps. Sprinkle over berry mixture.
Bake crisp until berry mixture bubbles thickly and topping is golden brown, about 1 hour. Let stand 15 minutes. Serve warm or at room temperature.

NOTES:  I used an 8x8 square baking pan instead of the pie plate and it worked just fine.  I usually don't care for the topping of crisps like this, but this one was great!

I love this recipe because you don't have to wait for fruit to come in season - it uses frozen berries and because of that, it's quick to put together, too.  
 
Nate threw the BIGGEST fit about trying this (the turd).  After lots and lots of deal making, he finally tried a bite and he liked it (of course).  And Mason?  He devoured his serving (of course)!

This isn't the greatest picture, but trust me...this was so good!  I'll absolutely be making this again.  You could serve it with ice cream, which I considered but decided against because the hubs gives me a hard time when I bring home "plain vanilla" ice cream.  And this time he gave me a hard time because I *didn't* bring home "plain vanilla" ice cream.  Damned if I do, right?
 
Speaking of great recipe databases, I found DinnerTool yesterday and it's got some great tools (as it should since *tool* is right there in the name!).  I especially love the meal planner - find a recipe, drag it to the day and you've got your menu made out for you.  And then once you get your menu set, you can use the shopping list to add and edit your list for your next trip to the grocery store.  If you're anything like me, there's always *something* you forget and have to go back at the last minute because it's a key ingredient in what you're making for dinner that night!  Do you have a favorite recipe database?

It's been really nice here overall.  Despite the wind, the trees and flowers are blooming like crazy!  

This is the view out the back of the clinic.  The trees are all blooming and while they're pretty, they're dropping pollen bombs like it's WWIII.  Thankfully they'll finish their blooming cycle soon and leaf out and my allergies should subside a bit.  See...there is beauty in the desert.

Thursday, March 3, 2011

Velvety Goodness

Good morning day, dear readers.  I was going to post this in the morning, but I didn't have the pics on my flash drive, so I postponed it to the evening.  I'm tired.  Don't judge. We've almost made it through another week. Has it been a good one for you? My week has been pretty much the same as it usually is: busy. BUT!! I've been secretly obsessing over the fact that my 21-month-old, Mason, hasn't started talking. OK. Maybe not so secretly obsessing, but obsessing nonetheless. We'll hear an occasional *hi*, or what we think is a word, but we can't get him to repeat it with any sort of consistency. Then yesterday, Nate saw a hot air balloon in the sky. We turned the corner and Mason pointed up to the sky and said: "I see it!" WOOT!! So, we don't get a *first word*, we get a first PHRASE!! Finally. Little turd was driving me crazy!


I know I've been slacking on posting good-for-you recipes and I apologize.  Kinda.  Everybody needs a good dessert every now and then - just view these recipes as good-for-your-soul.  K?  K.  Anyway...I made this awesome cake for a co-worker's birthday at the beginning of February.  I asked her what kind of cake she wanted (she could choose anything) and this is what she picked.  I ended up staying home for a couple days because of the snow, so it sat in my garage until I made it in to work.  It was just as good a couple days old as it would've been that first day. 

Red Velvet Cake 
1 cup vegetable shortening
2 eggs
1 tsp unsweetened cocoa powder
2 ounces red food coloring
2 1/2 cups cake flour
1 tsp salt
1 cup buttermilk
1 tsp vanilla extract
1 tsp baking soda
1 tsp distilled white vinegar
White frosting (recipe follows)

Preheat oven to 350 degrees F.

In the bowl of a mixer, cream together the shortening, eggs and sugar. In a separate small bowl, mix together the cocoa and food coloring. Add the paste to the shortening mixture. Sift the flour and salt together over parchment. Add to the batter alternately with the buttermilk in 3 additions. Add the vanilla extract. Fold in the baking soda and vinegar. Pour the batter into 2 greased 9-inch cake pans. Bake for 30 minutes or until an inserted cake tester comes out clean. Let cool on a cooling rack. Invert the cakes from the pans.

White Frosting
2 Tbsp flour
1 cup milk
1 cup unsalted butter
1 cup confectioners' sugar
1 tsp vanilla extract

Over medium heat, cook the flour and milk until thickened. Let cool. In the bowl of an electric mixer, cream together the butter, sugar and vanilla until light and fluffy. Beat in the flour mixture.
Frost the top of the first layer with frosting and set the second layer on top. Frost the entire cake with remaining frosting.


NOTES:  This was the first time I'd ever made red velvet cake.  I was *shocked* at how much red food coloring goes in to the recipe - 2 ounces!  That's 2 *entire* (small) bottles!  I didn't care for this frosting.  I don't know if I didn't mix it enough, but it was kinda...I don't know how to describe it...it just wasn't what I expected.  Not bad, but not perfect.


This was also the first time I'd ever bought buttermilk.  Little did I know I would find my ultimate pancake recipe as a result.

Now *that* is RED!  It's like bright arterial splatter blood.  Got the visual?  No?  How 'bout this?

Now you got it?  Good.  Anyway, it was *bright* red, and one of the docs said...well...I won't go in to that.  After all, this *is* a post about cake.

See...it kinda looks like cottage cheese.  Or paste.  Either way, it didn't look like frosting should look.  Maybe I didn't mix enough.  It was edible, and I guess that's all that matters.

Now in this picture, the frosting definitely looks like paste.  Or stucco.  LOL  Don't get me wrong...it got the job done, but next time I'll find another recipe for the frosting.  Maybe cream cheese frosting or vanilla buttercream.  


This was so good (even as much as I'm bitching about the mediocre frosting)!!  My coworker loved it.  And so did the rest of the office.  For some reason (yeah, I can't imagine why), I'm the baker of the birthday cakes (or pies, or cookies, or whatever).  I asked who was going to make *my* cake when my birthday comes around...somebody already volunteered.  Now, we'll see if she's still around come August.


So, it's a good thing I had to wait to post this because I was going to give you the wrong recipe!  I *knew* the frosting recipe on the other link didn't look right and now I know I was right.  Ugh.  I'm tired! 

Monday, February 21, 2011

Now Made With Real Girl Scouts!

Good morning, Kitschies!  I hope you enjoyed your weekend.  Most of mine was spent cleaning up around the house, doing laundry and all that fun kind of stuff.  We did get out of the house for a little bit to celebrate my nephew's 7th birthday.  The boys (the hubs and I) had a lot of fun!  Unfortunately I have to work today (it's President's Day here in the US), but I'm not complaining - at least I have a job.

On to the goodies, shall we?  The hubs and I were doing some cleaning in the kitchen last week and we realized we had an unopened box of Thin Mint cookies hiding out on top of the fridge left over from last year(blasphemy, I know)!  I didn't want to eat the cookies plain because they probably would've been pretty stale, but I had heard somebody mention they've made a Thin Mint cake before and I started on a quest to find said recipe.  Because who wouldn't like them in cake?!  And since Girl Scout cookies will be available starting later *this week* (WOOT!), I thought I'd share this recipe with you now so you can make this awesome cake for yourself!


Thin Mint Cake
1 box Duncan Hines dark chocolate cake mix
1 cup finely chopped (about 1 sleeve of cookies) Thin Mint cookies
1/3 cup plus 1 Tbsp Creme de Menthe Liqueur
3 eggs
1/2 cup oil
1 cup water
Ice with your favorite icing (recipe to follow)

Pre-heat oven to 325*.

Line bottom of cake pan with parchment paper & spray sides of pain with a flour/oil mixture.  Place all wet ingredients in bowl first including eggs, then add cake mix & mix until thoroughly blended.  Add 2/3 cup of the crushed cookies in to the batter.  Pour into the pan(s) and back 40-45 minutes.  Remove from oven and dump cake onto waiting Glad Press 'n Seal wrap (sticky side up).  Wrap the warm cakes tightly and put in the freezer.  You can freeze for as little as 3 1/2 hours but for best results, freeze overnight.  This adds moisture to the cake and straps in the flavors.  After removing from freezer, allow to sit for about 10 minutes.  Mix the remaining cookie crumbs into your favorite icing recipe along with a Tbsp of Creme de Menthe Liqueur.

Chocolate Mint Buttercream Frosting
(for Thin Mint Cake)
6 Tbsp butter
1 cup powdered sugar
4 Tbsp cocoa
2 to 3 Tbsp milk
1/3 cup finely crushed Thin Mint cookies
1 Tbsp Creme de Menthe Liqueur

Cream butter.   Add sugar and cocoa mixture to butter.  Add crushed Thin Mint cookies.  Add milk to butter mixture, starting with 2 Tbsp.  Add Creme de Menthe Liqueur to mixture.  Blend until frosting consistency.

NOTES:  I used Devil's Food cake mix.  There are two kinds of Creme de Menthe liqueur: clear and green.  We used green, but only because it was a couple bucks cheaper.  It says to line the pan with parchment paper, but that's a big pain in the butt, so I spray it liberally with non-stick cooking spray and then dusted with cocoa powder.  No sticking issues.  The recipe calls for the cake to bake 40-45 minutes but in two 9-inch cake rounds, that was WAY too much time - I just followed the time listed on the cake mix box and it turned out perfectly!  I've never made frosting before and was afraid it would be hard to do, but it wasn't.  I doubled the recipe and had just enough for frosting between the layers and to cover the cake.

Looks like some sort of alien concoction.  Oil, eggs and green liqueur.  Yum!

I had an eager little helper!  He did really good until it came time to take the cakes out of the oven...then he lost interest.  LOL

Stir in those cookie crumbs!  He got a little bugged at me that I didn't let him have a cookie.  Poor Natey!

The best part of baking a cake with Mom is getting to lick the scraper!  He got the beaters, too.  If I had eaten that much uncooked batter, I would've gotten a stomach ache.


The middle of each of the cakes was a little sunken, but I leveled them out and they were fine.

Ready for wrapping with the Press 'n Seal - kinda strange, but it worked.  The cake was super moist even though the edges got just a tad over-cooked.

Straight out of the freezer.  Unless you want super cold cake, let it sit out a bit before you serve it.  I didn't mind, and actually, I think I liked it a just a little better when it was still a little frozen.

YUM!!  I want to make another!  Nate doesn't usually eat a whole piece of cake - he'll eat the frosting for sure and *maybe* a bite or two of the actual cake.  He asked for a second piece of this one!


SOOOO GOOD!!  Super moist and super rich.  I saved about half the cake for home and took the rest to work.  Everybody loved it!

Happy Girl Scout cookies!  I hope you try the cake, and if you do, let me know how it came out.

Thursday, January 13, 2011

Life, With Pits & All

Good morning, Kitschies!  No, I didn't forget about y'all yesterday - it was just SUPER busy at work.  I am in the process of working on our new EMR program and it's a tad overwhelming.  I can usually work on things here at the clinic for hours at a time, but this?  I can only work on it for about an hour before my brain just stops working.  Like, I can't think of the next step even though I've done it over and over again.  *sigh*  At least I'm off tomorrow.  Don't you just love 3-day weekends?

OK.  So.  I've had this recipe in my pending file for a while (was it before Thanksgiving?!).  One weekend I told my hubs I wanted to make a pie and he immediately said "Cherry!".  I went browsing through my Allrecipes recipe box and found a tried and true recipe for his beloved cherry pie.

Cherry Pie
2 cups all-purpose flour
1 cup shortening
1/2 cup cold water
1 pinch salt

2 pounds sour cherries, pitted
1 1/8 cups white sugar
3 1/2 Tbsp cornstarch
1 Tbsp butter
1/4 tsp almond extract

In a large bowl, combine flour and salt. Cut in the shortening until pea sized. Stir in water until mixture forms a ball. Divide dough in half and shape into balls. Wrap in plastic and refrigerate for 4 hours or overnight. Roll one ball out to fit a 9 inch pie plate. Place bottom crust in pie plate. Roll out top crust and set aside. 

Preheat oven to 375 degrees F (190 degrees C.) In a saucepan, combine cherries, sugar and cornstarch. Let sit for about 10 minutes. Bring to a boil over medium heat, stirring constantly. Lower the heat and simmer for 5 minutes or until the juices thicken and become translucent. Remove from heat and stir in the butter and almond extract. Mix thoroughly and pour into pie shell. Cover with top crust, seal edges, and cut away excess dough. Make several small slits in the top to allow steam to escape.

Bake in the preheated oven for 45 to 55 minutes, or until crust is golden brown.

NOTES:  I didn't use the crust recipe given here; I used pre-made refrigerated dough and rolled it out to fit the 9-inch pie plate.  I didn't want to mess with the lattice top, so I borrowed Nate's PlayDoh cutter and cut out a bunch of cute little snowflakes for the top.

Separating out the juice from the cherries would've been easier if it wasn't the consistency of jelly.


I was afraid the "sauce" wouldn't thicken because it seemed pretty thin once I removed it from the stove.  But once it sat in the fridge for a bit, it firmed up perfectly!


It's been too long since I prepped a pie shell.  I cut the edge of the crust too short and didn't leave any to tuck under.  I ended up with crispy edges as a result (and that's even *with* a pie hat).
Aren't those little snowflakes cute?!  I should've made more and overlapped them a bit, but it wasn't bad for my first try at something decorative like this.
See?  Crispy edges.  *sad Megan*  Well, you can't win them all!  LOL  Yep.  I really should've made more snowflakes.


Today is my Friday here at work...and I definitely need the break!!  4 straight days of stress headache is wearing me down.  I may be back with a post tonight, or it might wait til tomorrow.  Or the weekend.  Either way, I'll be back.  Oh, and I'm going to announce a little giveaway some time in the next week, so keep your eyes open!

Monday, January 3, 2011

Routine is Good

Happy Monday, dear readers.  It was back to the grind for me today.  Oh, I went to work last week, but only for a day and a half, so that doesn't really count.  It was hard to drag my butt out of bed so early this morning, but once I was up and showered, I was actually pretty happy to be getting back to the normal routine.

I've seen a lot of blogs asking about resolutions for the new year.  I don't usually make resolutions because I'm not very good at keeping them longer than a month and then I end up feeling guilty because I've "failed".  So, instead of specific resolutions, I'm making it a general goal to better myself: mind, body and spirit.  Today was pretty good - check back tomorrow to see if it's stuck with me.  LOL

Now, this recipe doesn't fit in with that goal, especially bettering my body.  I went on a baking binge before Christmas and luckily we gave most of the "proceeds" to family and coworkers.  I love macaroons but had always been afraid to make them because I didn't have a clue where to begin.  Enter Allrecipes.  What did we *ever* do before the interwebs?  These were super easy to make and I don't know what took me so long to try.

Coconut Macaroons
2/3 cup all-purpose flour
5 1/2 cups flaked coconut
1/4 tsp salt
1 (14 oz) can sweetened condensed milk
2 tsp vanilla extract

Preheat oven to 350*.  Line cookie sheets with parchment paper or aluminum foil.

In a large bowl, stir together the flour, coconut and salt.  Stir in the sweetened condensed milk and vanilla using your hands until well blended.  Use an ice cream scoop to drop dough on to the prepared cookie sheets.  Cookies should be about golf ball size.

Bake for 12-15 minutes, or until coconut is toasted.

NOTES:  Yes, use your hands.  I tried using a wooden spoon but it was impossible to get the whole thing mixed thoroughly.  I used aluminum foil to line the baking sheet, but next time I'll probably use parchment paper because it was a little tricky getting the macaroons up from the foil.  My cook time was a little longer than 15 minutes because the coconut was not browned to my liking.


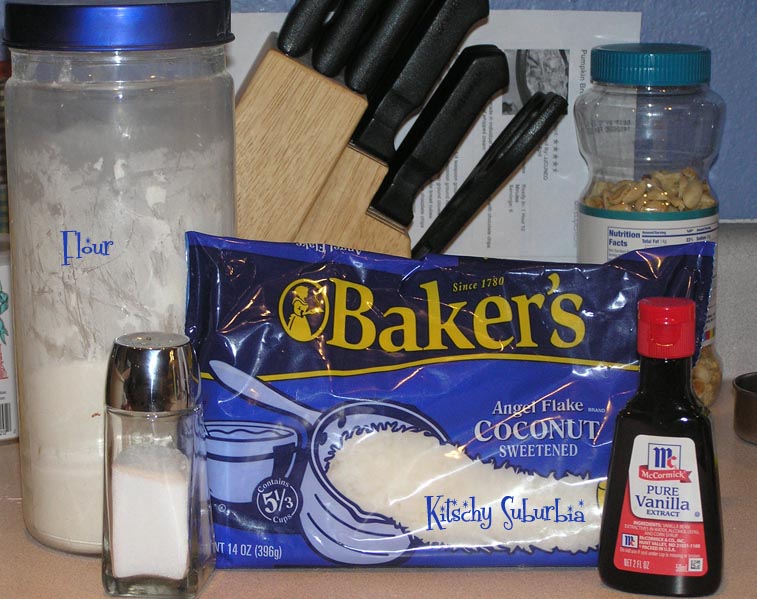
A large bag of coconut - it didn't look like 5 1/2 cups, but it was.  Ignore the peanuts in the back - counter space and time is precious.  Never enough of either.


Untanned and pasty looking, but I wanted to grab a ball and eat it anyway.  I didn't.  But I wanted to.


YUM!  We never had macaroons in the house growing up because my mom detests coconut.  I had no idea what I was missing.

This weekend we decided to bundle up the boys and take them to the park.  It's been crazy cold (for central NM) the last week or so, and we were getting a little stir crazy being stuck in the house every day.  It was sunny and there wasn't any wind.  Once we got out and started moving around, it wasn't so bad.  Here are my two favorite pictures from the day.


I caught this picture just. in. time.  I love it!  There was just enough snow left on the ground for Nate to stomp around in and not get too messy or cold.


Mason doesn't look very happy to be all bundled up, but he was super happy to be outside!  He goes up to his jacket that's hanging on the wall and tugs at it and gets very upset if we don't go outside NOW.  He looked so cute with his little pink cheeks and nose!

Oh!  And one more thing (promise...only one more).  Lu over at just Lu has come up with an awesome idea: Housewife MacGyver (minus the mullet, of course) and she asked if I'd be interested in participating.  Of course I want to play!!  Hop on over to her blog to check it out and drop her a line of you'd be interested in sharing a little bit of *your* expertise. Click on the little linky and it'll take you quick as a flash!

Housewife MacGyver


I think that's enough for tonight.  Dang it!  OK.  I lied.  But I think you'll like this.  I have ONE MORE thing to share.  Zoya, if you haven't heard, is offering 3 free bottles of polish to anybody who's interested.  Just use code FB2011 at checkout and you get your choice of 3 bottles of polish.  Really.  It's awesome!  The code is good through this week only, so hurry up and go pick your 3 favorite colors (it was hard to chose 3, but I did).

Monday, December 20, 2010

Cookies in the Snow

Good evening, Kitschies!  I hope you had a restful weekend.  Me?  Notsomuch.  LOL  Friday night was the hubs' office Christmas party.  The party was held at a local restaurant that serves *awesome* food.  The hubs' office Christmas parties are always a good time.  They host a white elephant gift exchange that can go on *forever*, but there's usually a good assortment of goodies to be had.  This year we ended up with a digital coffee maker - YAY!  After the party I was planning on coming home and doing stuff around the house, but I was DONE.  The next morning the hubs had to take one of the dogs to the vet and I got to sleep in a bit.  Nate got up around 7:30 and he crawled in bed with me to watch cartoons for a while.  Mason didn't get up til 9!  It was so nice to get a little break!  Saturday early afternoon, we had our nephews over to spend the night.  They kept my boys occupied so I was able to get to the library and then I got started on a day of baking (that extended in to the next day).  I was a baking fool this weekend!!  The boys stayed up late watching Despicable Me and I got the ironing done.  *whew*  We're not even done yet!  Sunday afternoon/evening, we had family over to celebrate Christmas for the kids since we won't be in town for the big day.  We had TONS of food and even more goodies.  We ate as much as we could possibly eat (including two AWESOME pies made by my SIL) and the kids played and played.  Good times were had by all.  To thank me for all my hard work around the house and in the kitchen, the hubs offered to clean the kitchen.  SCORE!!  I was so busy, I didn't even have time to do my nails. *gasp*  They were nekkid in front of company!  LOL  I took advantage of the hubs cleaning the kitchen and I did my nails (that post later this week).  After that, I tried to read a book, but I couldn't get past page 3, so I gave up and went to bed.  I was exhausted!  This morning came *much* too early, but I dragged my groggy butt out of bed and started on my 2 day work week.

So, I mentioned I was a baking fool this weekend.  I'm going to share one of my all-time favorite cookie recipes with you today.  I've made these cookies before, but I couldn't find the recipe (I know, Mom.  Big surprise.), so I emailed my mom to ask her if she'd send me the recipe.  She did.  Then I got home and I realized I'd left the recipe print out at work and the email was in my work email.  So I asked her to email it to me again at home.  LOL  Good thing she knows to type up and save any recipe I ask for because I've been known to ask for the same recipe over and over (and over) again!


Sugar Cookies
Preheat oven to 400*.

Blend together
1/2 cup shortening
1/2 tsp salt
1 cup sugar

Beat in
1 egg, unbeaten
2 Tbsp milk

Stir in
2 cups all-purpose flour
1 tsp baking powder
1/2 tsp baking soda

Drop by rounded teaspoonful on to greased baking sheet.  Grease bottom of glass.  Dip glass bottom in sugar.  Press cookies to flatten.  Sprinkle with cinnamon.  Bake 8 - 10 minutes, or until golden brown.  Transfer to wire rack to cool.


Now that I'm seeing these, I'm wishing I made a double batch.  These are super easy cookies to make.  If Nate hadn't been busy with his cousins, I would've asked him to help.

Since I didn't have very many pictures of the cookies, I thought I'd share some pics of our first snow that started this last Thursday night.


It had snowed on and off Thursday afternoon so there was a dusting by the time I got home.  But by 8 pm, this is what our front yard looked like.


Our backyard.  Nate wanted to go out and play in the snow - I wouldn't let him (it was already past his bedtime).  Every time I looked out the door that night, it was snowing.  It was so peaceful!


The morning after.  Our front pine tree was feeling the weight of all the snow - good thing we didn't get *that* much!


The backyard.  Brrrrrr!  We got about 6" of snow in Rio Rancho - the valley didn't get quite as much.  This was more snow than we got last winter.


This is the view straight out our back door.  It was so pretty!  Most of the snow stuck around until Sunday afternoon.


I don't mind the snow - especially if we don't have to be out in it.  I texted my boss Friday morning to tell him that I was going to be late.  His reply?  I need to get reindeer.  LOL

I have a couple more things left to do this evening, so I better get off the computer.  I was going to wrap the rest of the gifts tonight, but the hubs decided he'd take all the wrapping paper with him to the studio tonight so he could do his own wrapping.  *sigh*  Best laid plans...

Tuesday, December 14, 2010

Heaven In A Pan

Good day, Kitchies!  The days are flying by.  Never enough time to get things done that I want to do.  And Christmas is coming FAST!!  I have most of my shopping done (except for the hubs' stocking) and we started wrapping this weekend.  Work isn't quite as hectic today, so I thought I'd share a recipe with you.

A while back my mom emailed me this recipe.  As soon as I saw it, I *knew* I had to make it.  Especially since I was on a pumpkin kick!  I gathered up the ingredients and I gave it a go.  If you like bread pudding, you'll love this recipe!

Pumpkin Bread Pudding

1 egg
3 egg yolks
1 1/2 cups whole milk
2/3 cups sugar
3/4 cup canned pumpkin puree
1 tsp vanilla extract
1/8 tsp salt
1/4 tsp ground cinnamon
1/4 tsp ground nutmeg
1/4 tsp ground cloves
3 1/2 cup white bread cubes
3/8 cup miniature chocolate chips
2 Tbsp brown sugar 

Preheat oven to 350 degrees F (175 degrees C). Lightly grease 6 large custard cups.

Whisk together the egg and egg yolks in a large bowl. Add the milk, sugar, pumpkin puree, vanilla extract, salt, cinnamon, nutmeg, and cloves; whisk into a smooth batter. Add the bread cubes and toss gently to dampen. Set aside for 15 minutes. 

Pour the batter evenly into the prepared cups. Sprinkle chocolate chips and brown sugar over each portion. Arrange the custard cups in a shallow baking pan. Pour hot water into the baking pan to halfway up the sides of the custard cups. 

Bake in preheated oven until pudding is golden brown and puffy, about 40 minutes; transfer to cooling rack for 10 minutes. 

NOTES:  I don't have custard cups, so I used an 8x11 glass baking pan.  It worked just fine.  I used half a loaf of French bread and though that was just a touch more than 3 1/2 cups of cubed bread, it was the right amount.   I used fresh pureed pumpkin instead of canned and I think that gave the recipe a little added moisture.  I didn't measure the chocolate chips, nor did I measure the brown sugar.  I added whatever looked like enough.  


I used fresh French bread so it was a little difficult to cut the bread in to cubes, but I imagine you could tear up the bread instead.


Everybody in the pool!  I didn't have mini choco chips on hand so I used regular milk choco chips.  Sprinkled them on and threw the batch in the oven.


This was SOOOOO good!!  I *had* to have a helping after I pulled this out of the oven because the smell of it baking drove me insane.  If I wasn't planning on taking this to work the next morning, I would've had half the pan!


Making this post makes me want to go home and make this tonight. *drool*  You could easily do without the choco chips, but it was a nice added bit of sweetness.


This is best served warm with a drizzling of caramel sauce.  Gah!  I'm torturing myself with this post.  Seriously one of the best desserts I have ever made (in my opinion).  I took this to work and it vanished by 10:00.


Back to work I go!  The EMR system is coming together slowly.  Thankfully only one of the docs are using it right now.  When we do finally go "live", it's going to be chaos and I have a feeling I'm going to want to change my name.  LOL

Wednesday, December 8, 2010

Let Them Eat (Cheese) Cake

Good day, dear Kitschies!  I hope this day has been good for you so far.  It's been business as usual here at work, which is a good thing.  I don't mind the routine - it keeps my mind occupied from all the things I have yet to do. 

Today I'm sharing one of my favorite pumpkin recipes from you.  But I can't take full credit for it.  A couple years ago, my bestie's hubs made this for Thanksgiving and I've been hooked ever since.  He got this recipe from The Food Network, more specifically, Paula Deen.  I had always been afraid to make a cheesecake.  This was the first recipe I had tried and now I make it at least once a year.  So good!

Pumpkin Cheesecake
Crust
1 3/4 cups graham cracker crumbs
3 Tbsp light brown sugar
1/2 tsp ground cinnamon
1 stick melted butter (salted)

Filling
3 (8 oz) packages cream cheese, at room temperature
1 (15 oz) can pureed pumpkin
3 eggs, plus 1 egg yolk
1/4 cup sour cream
1 1/2 cups sugar
1/2 tsp ground cinnamon
1/8 tsp freshly ground nutmeg
1/8 tsp ground cloves
2 Tbsp all-purpose flour
1 tsp vanilla extract

Pre heat oven to 350*. 

For crust: In medium bowl, combine crumbs, sugar and cinnamon. Add melted butter. Press down flat into a 9-inch spring form pan. Set aside.

For filling: Beat cream cheese until smooth. Add pumpkin puree, eggs, egg yolk, sour cream, sugar and the spices. Add flour and vanilla. Beat together until well combined.

Pour into crust. Spread out evenly and place oven for 1 hour. Remove from the oven and let sit for 15 minutes. Cover with plastic wrap and refrigerate for 4 hours.

NOTES:  1 individually wrapped package of graham crackers is exactly 1 3/4 cups graham cracker crumbs.  I used fresh pumpkin puree rather than canned and I think that affected the texture.  It wasn't quite as dense as it usually is when I've used canned pumpkin.


Press the crumb mixture on the bottom of the spring form pan.  I've seen pictures with the crust up along the side, but I'm not coordinated enough (or more likely, not patient enough) to do that.

 
Before the cake cooks, the filling is almost all the way to the top of the pan.  It will puff up a bit while it's cooking, but it'll settle and become more dense as it cools.

 
Fresh out of the oven.  Nice and caramel-y brown.  It comes out quite puffy, but once it cools on the wire rack, it falls a bit and ends up looking like your typical cheesecake.
 
 
YUM!  This has such good flavor, it really doesn't need any extra whipped cream or sauce on top.  The leftovers (if there are any) store very well in the fridge as long as it's covered with plastic wrap.
 
Do you have any recipes you were afraid to try but once you did, you loved it?